

Are you moving to a Public or Private Cloud? If so, you are not alone. Over the past decade, there has been an increase in investment in cloud computing by small to medium businesses. Globally many organizations have already shifted to cloud platforms to take advantage of the latest technology.
This article provides a basic overview of RDS and step-by-step guidance for creating an RDS database.
So, let’s begin!
Foremost**, What is RDS?**
RDS stands for Relational Database Service. It’s managed Database service, that uses SQL query language.
It allows the creation of a database in the cloud that is managed by AWS.

Why use Amazon RDS?
Amazon Relational Database Service (Amazon RDS) is a collection of managed services that makes it simple to set up, operate, and scale databases in the cloud.
It supports six different databases including a commercial option such as SQL Server and Oracle, with RDS your database operations are managed by AWS, leaving your team free to focus on innovation.
Amazon RDS handles instance failover, data backups, and software updates
RDS Components
1. DB Instances
A DB instance is an isolated database environment in the Amazon Web Services Cloud. The basic building block of Amazon RDS is the DB instance.
DB instances can contain one or more user-created databases.
You can have up to 40 Amazon RDS DB instances
DB Instance Classes
Amazon RDS supports three types of instance classes
A. Standard classes (includes m classes)
B. Memory optimized classes (includes r and x classes)
C. Burstable classes (includes t classes)
2. DB engines
A DB engine is the specific relational database software that runs on your DB instance. Amazon RDS currently supports the following engines:
1. MariaDB
2. Microsoft SQL Server
3. MySQL
4. Oracle
5. PostgreSQL
Each DB engine has its own supported features, and each version of a DB engine can include specific features.
3. Amazon RDS storage
Amazon RDS uses Elastic Block Storage (EBS) volume for DB and logs storage
There are three types of storage in Amazon RDS
- General Purpose SSD (also known as gp2 and gp3)
General Purpose SSD storage offers cost-effective storage that is acceptable for most database workloads that aren’t latency sensitive.
2. Provisioned IOPS SSD (also known as io1)
- Provisioned IOPS storage is a storage type that delivers predictable performance and consistently low latency.
3. Magnetic (also known as standard)
Amazon RDS also supports magnetic storage for backward compatibility.
The following are some limitations of magnetic storage:
Doesn’t allow you to scale storage when using the SQL Server database engine.
Doesn’t support storage Autoscaling
Doesn’t support elastic volumes.
Limited to a maximum size of 3 TiB
4. AWS RDS Security
- At -rest Encryption( for data stored in the databases and is not moving through networks)
1. Database master & replicas encryption using AWS KMS must be defined at launch time.
2. If the master is not encrypted, the read replicas cannot be encrypted
To encrypt an UN-encrypted DB, go through a DB snapshot & restore it as encrypted.
- In flight Encryption (For data that moves over a network.)
TLS-ready by default, use the AWS TLS root certificate client side
- IAM Authentication
IAM roles to connect to your DB
- Security Groups
Control Network Access to your RDS DB
5. RDS Storage Auto Scaling
Helps you to Increase storage on your RDS DB instance dynamically.
When RDS detects you are running out of free database storage, it scales automatically.
Need to set maximum storage threshold(maximum limit for DB storage)
Automatically modify storage if:
1. Free storage is less than 10% of allocated storage
2. low storage lasts at least 5 minutes
3. 6 hours have passed since last modifications
You cannot SSH into your instance.
Because its manages service, we do not have access to underlying ec2 instance
Use cases Of RDS
Web and mobile applications
Enterprise applications
Online games
Various versions of Amazon RDS and Amazon Aurora are used by start-ups for powerful and scalable applications on AWS.
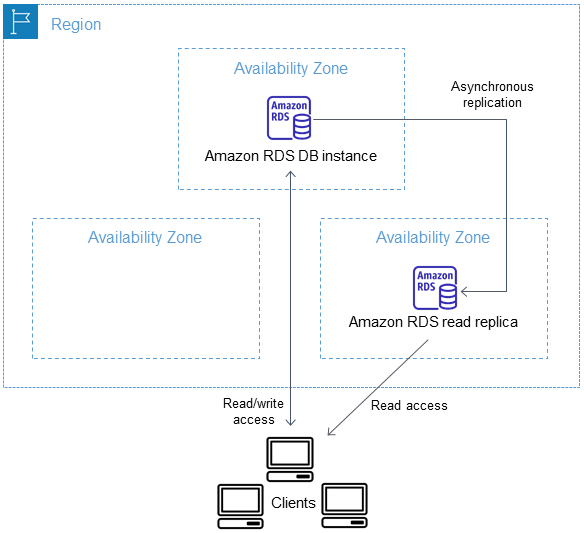
Read replicas
Read replicas, as the name suggests, help scale reads. Can create up to 5 read replicas within the same AZ, across AZs, or across regions.
Amazon RDS uses the asynchronous replication method for the DB engine to update the read replica whenever there is a change to the primary DB instance.
Read replicas are used for only reads (SELECT) Not INSERT, UPDATE, DELETE
Network Cost
In AWS there is a network cost when data goes from one AZ to another
For RDS read replicas with the same region, you don’t pay that fee
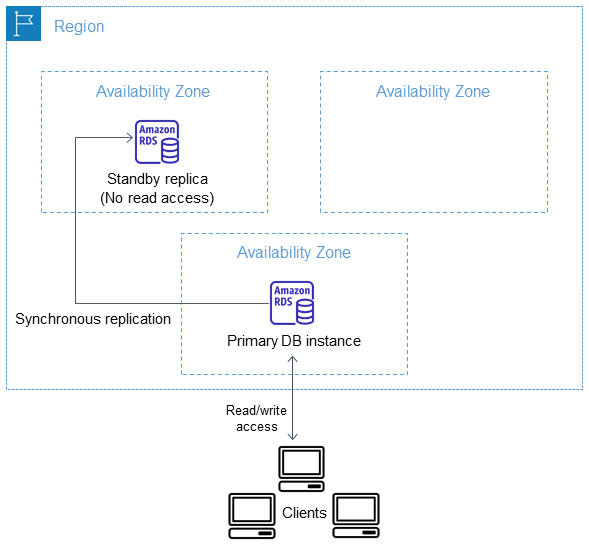
Amazon RDS Multi-AZ
Amazon RDS automatically creates a primary database (DB) instance
Replicate every single change in Master DB, whenever an application write anything in master DB that change also needs to also be in standby DB
We get only DNS name in case there is any issue in the master there will be automatically fail-over to standby DB
**Now let's see how to create an RDS Instance
**Follow the below step for creating your own AWS RDS Instance
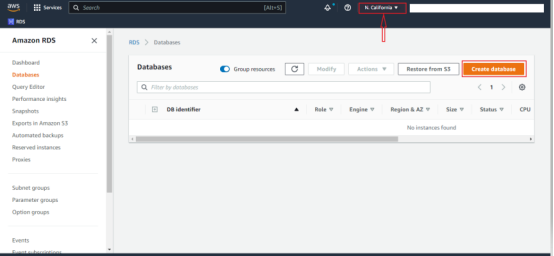
To get started, navigate to the Amazon RDS Console. On the main page, Select the region in which you want to create a DB.
Click on the Create database to create a new database. This initiates the database creation wizard.
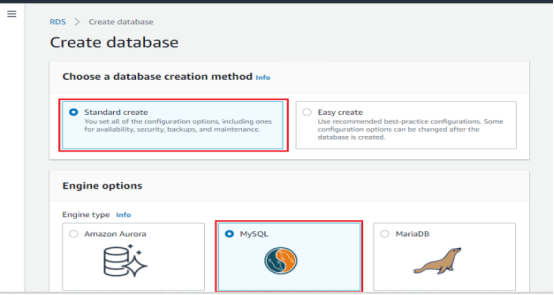
It will redirect to the Database creation page here choose a database creation method and select Standard to create.
In the engine option page here choose MYSQL as the Engine type. Then choose the version of MYSQL you want to use. Select the engine version.
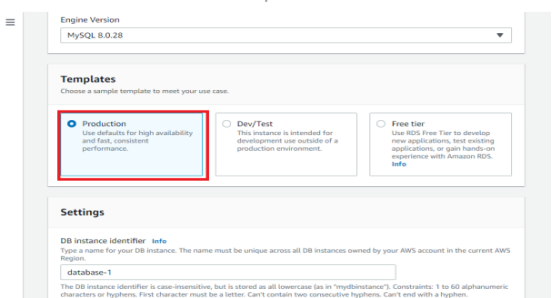
- The database creation wizard includes templates to make it easier to configure the settings for your Amazon RDS database.
1. If you are creating this database to use in production, you should choose the production template. Here you have full control over every option.
2. If you wanted to have a free tier setup, you would select the Free tier option, this would pre-select some options for the free tiers.
3. If you had a dev-test environment, then it would pre-select the option for dev-test.
Here, we’ll modify every option, Hence I’m going to use production as a template
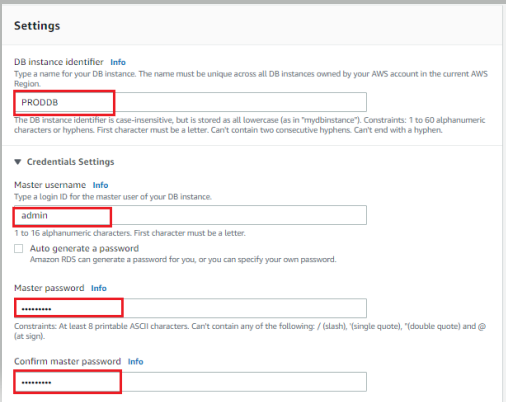
- In the Settings section, give your database a name, and set the master user name and password. Make sure to write it down because you need them to connect to your database and create additional users.
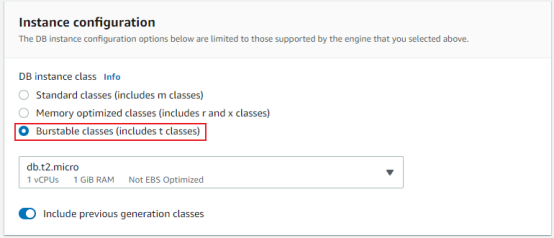
- Next, choose the database instance size.
This is the size of the underlying EC2 instance.
We have three classes
1. Standard classes
2. Memory-optimized classes
3. Burstable classes.
and within it, You should make this choice based on your estimated capacity. If you want to increase or decrease your database instance size in the future, Amazon RDS allows you to do that easily.
It will incur some downtime to change your database size. Here selecting as a burstable class and including previous generation classes. Choose db.t2.micro, which is within the free tier.
Next, configure the storage options for your Amazon RDS database.
There are two storage options in Amazon RDS: general purpose and provisioned IOPS, or I/O operations per second.
Now for storage type, if you are in production, use an Io1 type of EBS volume
Here will use gp2 type of volume which is within the free tier, and has lower performance.

We can also enable storage Auto Scaling, which will automatically increase the size of the EBS volume in case we are starting to near a threshold.
So for availability and durability. We have two options.
1. Create a standby instance
2. Do not create a standby Instance.
- because we want to remain within the free tier, going to use Do not create a standby Instance, but if you want to have a standby database instance, choose to Create a standby instance

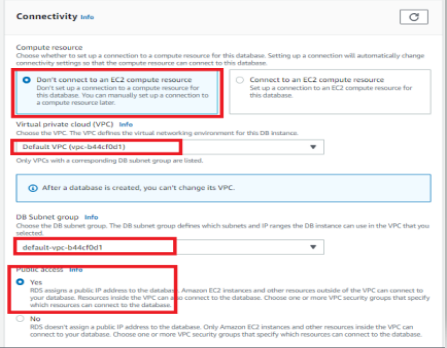
- Now for connectivity, we have two options
1. Don’t Connect to an EC2 Compute Resources
2. Connect to EC2 Compute Resources,
This is in case you wanted to make sure that there is connectivity between a specified EC2 instance and your RDS database. The configuration in terms of networking will be done automatically, So you don’t have to handle security groups.
As we are going to look at all the options. So selecting don’t connect to an EC2 compute resource.
If you want to have public access, here I want to access this database from my own computer, hence selecting yes.
- Next, we need to choose or create a security group. So I’m going to create a new security group. And the name is going to be DB_SG, and the port to connect to the database on MySQL is 3306.

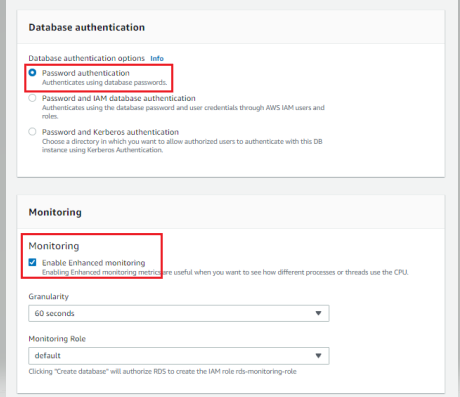
In terms of database authentication,
Use username and password, but we can also enable IAM database authentication to have IAM users and roles directly access RDS.
Password and Kerberos authentication. we can enable Kerberos.
We can enable monitoring and enhance monitoring giving you a 60-second granularity.
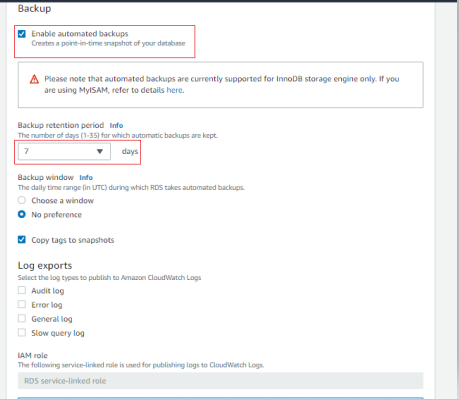
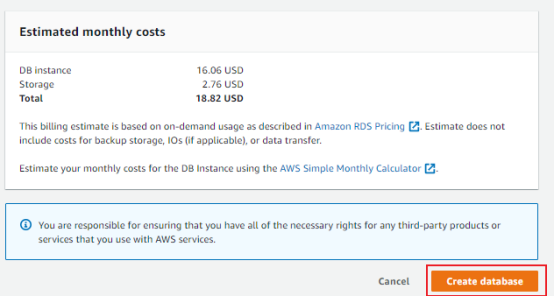
- There are some additional configuration options you can configure, including settings for backups, monitoring, maintenance, and automated upgrades. The default settings work for most situations, but you should review them as per your needs.
- The end of the database creation wizard shows you the estimated monthly costs for your database instance. Click on Create database to create your database instance.
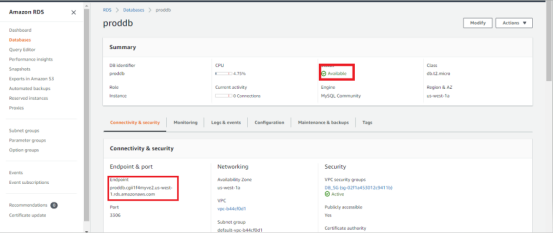
- When your database is ready to use, its Status is Available. Endpoint is required for connecting to RDS DB
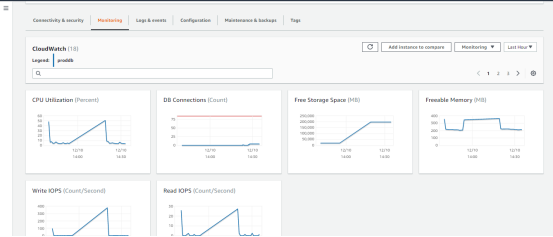
- From the Monitoring tab, we can monitor the CPU utilization, Storage etc.
Connect to RDS DB
For connecting to AWS RDS DB we can use any SQL client software application and a database administration tool.
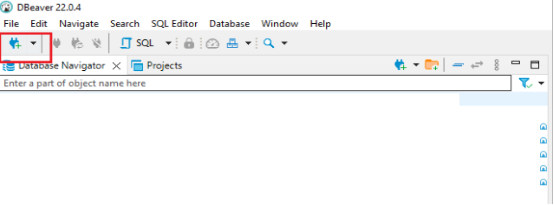
We are using DBeaver SQL client for connecting to our Database
For connecting to your DB follow the below steps.
- Open your DBeaver From the Left side of the corner select new connections.
- On the next window select MySQL as the database, Click on next
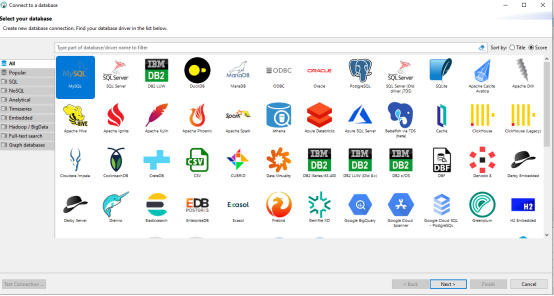
- It will redirect you to the Connection settings
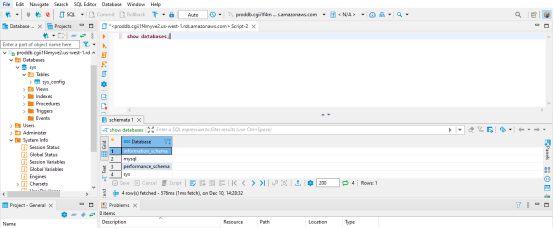
Here on Server Host paste your RDS endpoint. And put username and password.
- Finally, click on the test connection then Pop up will come as connected.
That means you are successfully connected to your RDS database

- You can create databases, Schema tables as per your need.
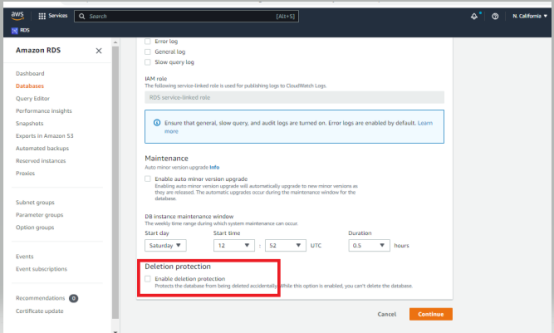
Deleting the RDS Instance
- Click on the modify Instance, and Uncheck the deletion protection. And click on continue.
- On the next window click on apply Immediately. And click modify DB Instance
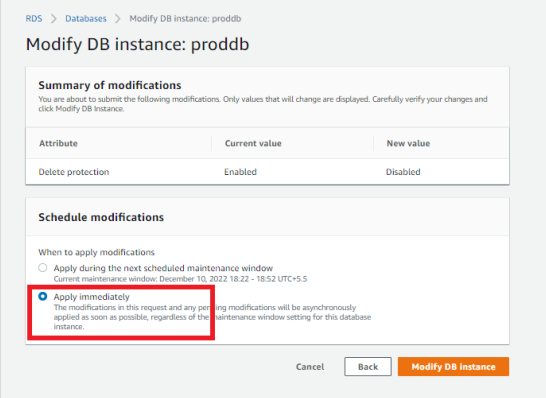
On the Database, main page select database and click on Action>>Delete>> On the next window type delete me
It will successfully delete your DB Instance
